Crochet Basics 4: how to Crochet a Chain
July 29th, 2017 | Leave a comment | by Nea
Hey guys!
This is the fourth lesson in my tutorial series, Crochet Basics. In this lesson we’ll learn how to crochet, count, mark and insert the hook in chains.
Start from the beginning >> Crochet Basics 1: Yarn, Hooks, Stitch Markers and Terminology
Previous lesson >> Crochet Basics 3: how to hold the Hook and Yarn
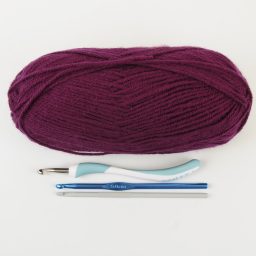
As per usual I am using the 100% acrylic yarn Favorite by Ice Yarns and a 5mm tapered aluminium crochet hook.
How to crochet a chain
Abbreviation: ch (used in patterns)
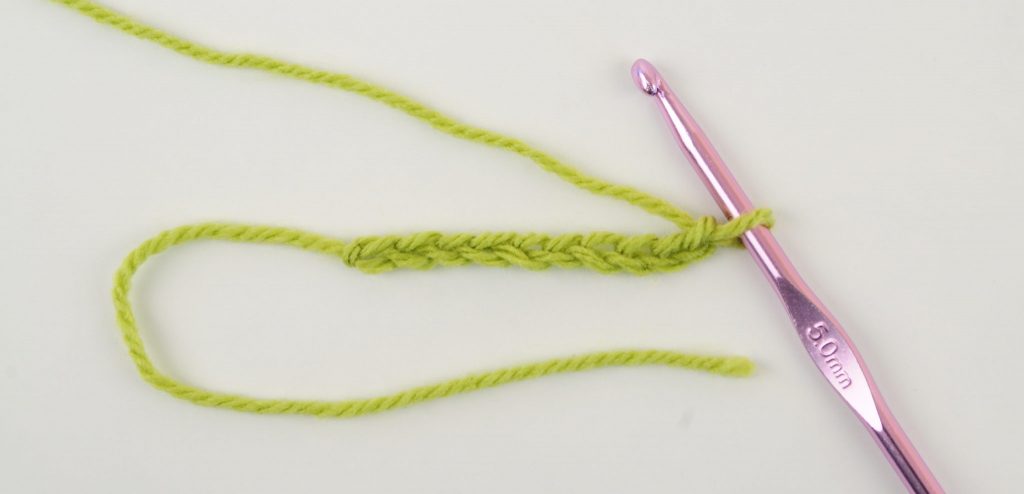
Chains can be used both as a foundation to any flat crochet project and to make more complicated shapes and stitches once you’re farther along.
Yarn over and pull through
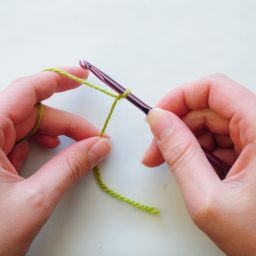
To be able to make a chain you need to know and understand how to do a yarn over. A yarn over consists of wrapping the yarn around the hook clockwise to create another loop on the hook. When yarning over with only a slip knot on the hook, it’s important to hold the slip knot loop in place. If you don’t, the loop will move around the hook and the yarn over will come undone. You can see that while chaining in the below video, I hold on to the yarn end and the chain itself when I yarn over to keep this from happening. A yarn over and pull through usually means yarn over, grab the loop created by the yarn over with the hook and pull it through whatever is outermost on the hook or through the specified stitch(es) or loop(s) on the hook.
With a slip knot on the hook:
- Yarn over, you now have two loops on your hook.
- Pull the loop created by the yarn over through the first loop on the hook, so that only the loop from the yarn over is left on the hook.
- Repeat 1 and 2 until you’ve created the desired number of chains.
So from what I said above this can also simply be written as:
- Yarn over and pull through the loop on your hook.
- Repeat 1 until you’ve created the desired number of chains.
How to count the chains
So, obviously if a pattern asks for you to create many chains, let’s say 100, there’s a chance that you’ll lose your count partway. Even if you don’t lose count you might feel unsure that you’ve crocheted the correct number of chains. Either way, you need to be able to count the chains once they’re made.
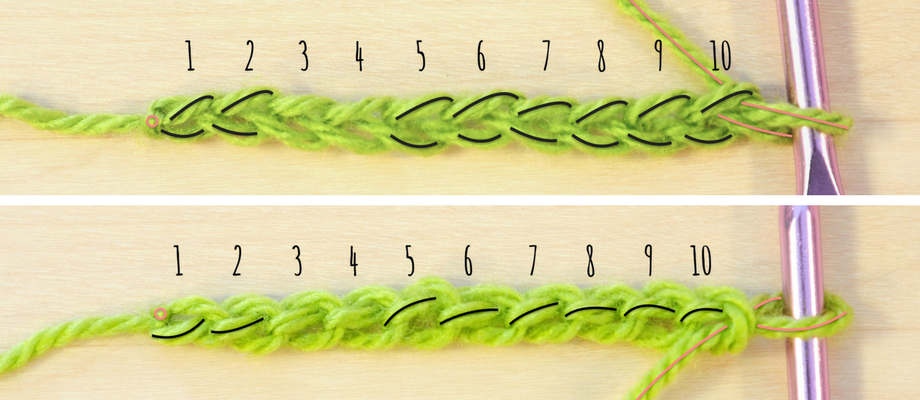
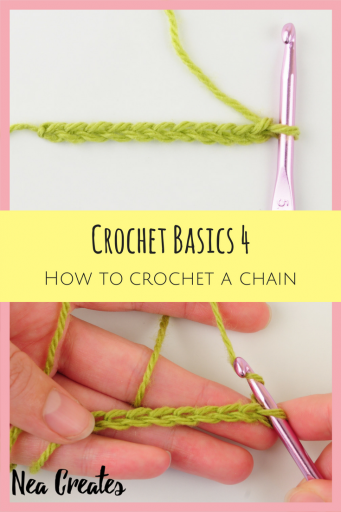
The front or up side of a chain (top pic) consists of two almost parallel loops. You can start counting the chains either from the slip knot or from the hook. It’s also best to focus on either the back loops (furthest from you) or the front loops (closest to you). In either case, the loop on the hook never counts as a chain. I personally start from the slip knot, which is what I’ve depicted as well, and I count the back loops.
Turning the chain towards you exposes the backside of the chains (bottom pic). The backside of the chains consists of the back bumps. There’s really no need to be able to count the number of chains from the backside of the chain. However, it can be useful to be able to identify the back bumps, for reasons discussed below.
How to mark a chain
It’s always useful to know how to mark a chain. You can do this several ways, the video below shows one way which we’ll use in the next lesson when we’ll learn our first crochet stitch, the single crochet.
This way marks the next chain you crochet. Of course you can also mark a chain simply by inserting a stitch marker under the front or back loop, the back bump, or any combination thereof.
Where to insert the hook in the chain
All the basic crochet stitches have a height measured in chains, so for example the single crochet is 1 chain high. This means that when you’re gonna crochet a flat piece that is 10 single crochets wide you need to chain 10+1 to account for the height of the single crochet. Then you insert the hook through the second chain from the hook (skip 1) and make the first single crochet. You will pretty much always skip at least 1 chain, so skip one now when you practice where to insert the hook.
These two techniques are the most commonly used for inserting the hook in the chain:

- Insert the hook under the back loop only of the chain.
- Turn the chain towards you until the back bumps show. Insert the hook under the back bump only.
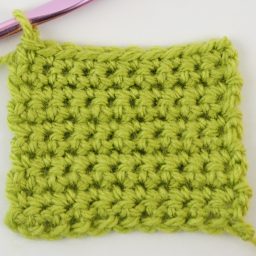
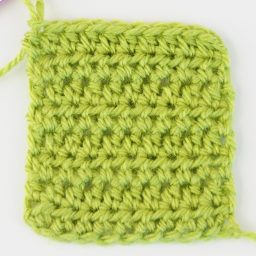
Number 1 is easier to execute while number 2 gives you a prettier edge. The edge left when using number 2 is also easier to work into if you want to add something to the piece after it is done.
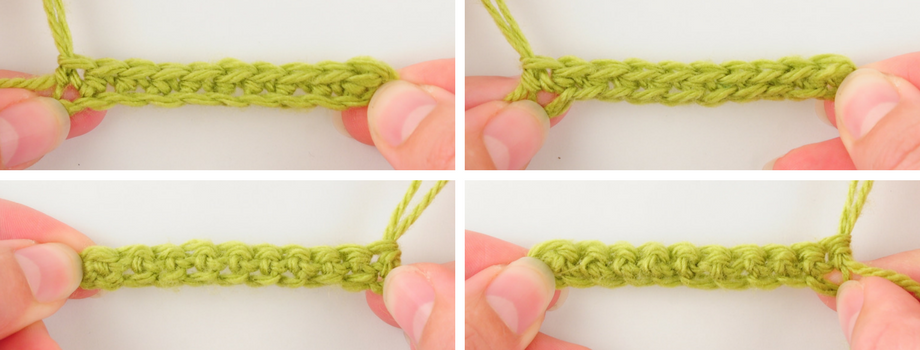
The images above are taken after single crocheting across a chain of 10(+1), using first technique 1 then 2. The front of the chain are shown on top, and the backsides underneath.
The most important thing to remember is to use the same technique throughout. I suggest that you start by learning number 1 properly, inserting under the back loops only. This is the technique I will use in instructional videos and images in coming lessons as well.
The slip stitch
The slip stitch is basically a chain made around a stitch or another chain. Making it the most basic stitch and very useful to know how to make.
Name: Slip stitch (US), Slip stitch (UK)
Abbreviation: sl st/ss (US), sl st/ss (UK)
- Insert hook through the next stitch or chain.
- Yarn over and pull back through the stitch or chain and the loop on the hook.
The slip stitch is often used when finishing off or for joining separate pieces of crochet. When working in the round, which we will talk more about in a later lesson, the slip stitch is used to join each round. Sometimes it is also used to create ribbing by slip stitching a flat piece. I’ve never done slip stitch ribbing myself so I’m not including a tutorial of how to do that. But at least you know how to crochet a slip stitch now!
Frogging
Before we get into actual crochet stitches it is useful to know how to undo your work. Meaning that if you see that you’ve made a mistake earlier in the work, you can frog/undo up until that point and fix it. Crochet is basically one long knot, but if you pull on the working yarn from the work it will unravel one stitch at a time. All you have to do is pull as far as you need to reach the mistake, then you can start crocheting again.
Great work! Now you guys know how to crochet a foundation chain and you’re ready to move on to learning actual crochet stitches!
Next lesson >> Crochet Basics 5: the Single Crochet Stitch
