Gustav the Gnome: Free Amigurumi Pattern
December 9th, 2017 | 17 Comments | by Nea

Hey guys!
I’ve finally finished another pattern. This is a good one. I had an idea for a Christmas tree, it didn’t turn out the way I wanted it to, so I had to come up with something else.
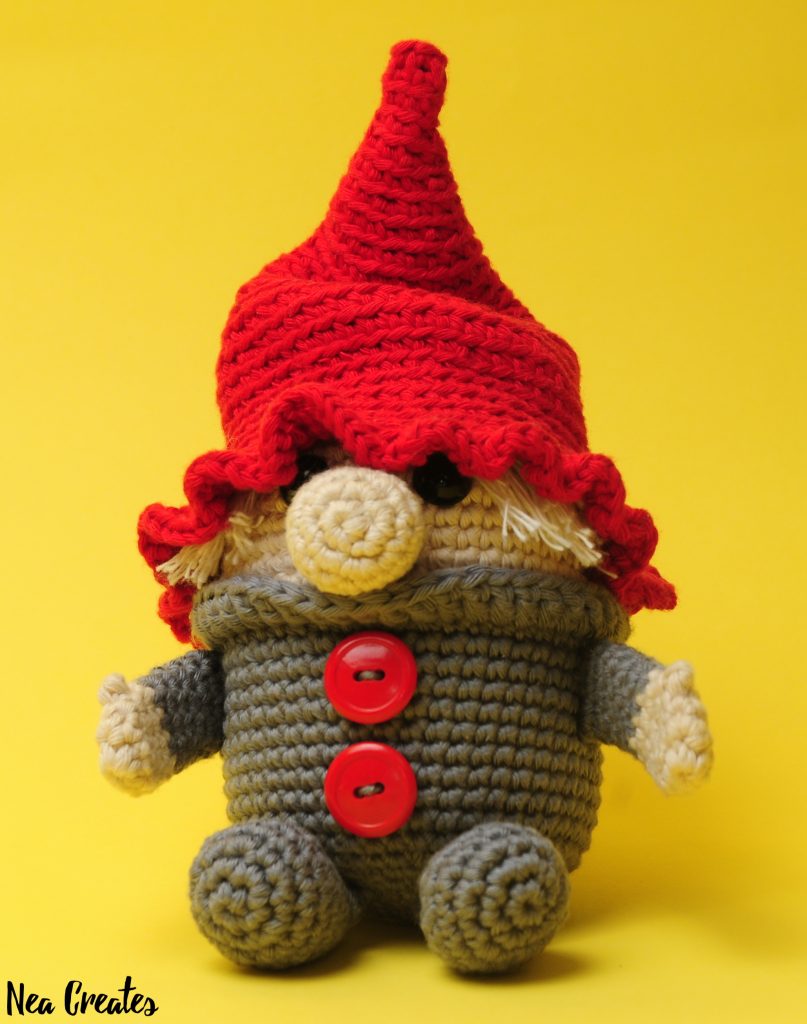
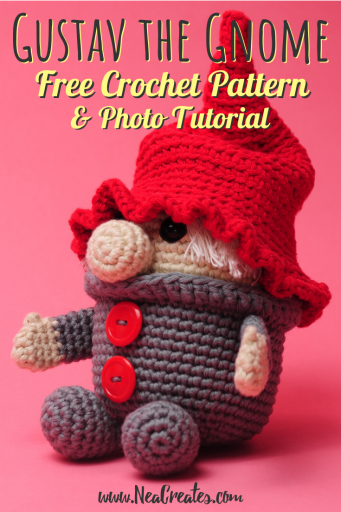
Gustav the Gnome is that ‘something else’, and he turned out great, even cuter than I imagined.
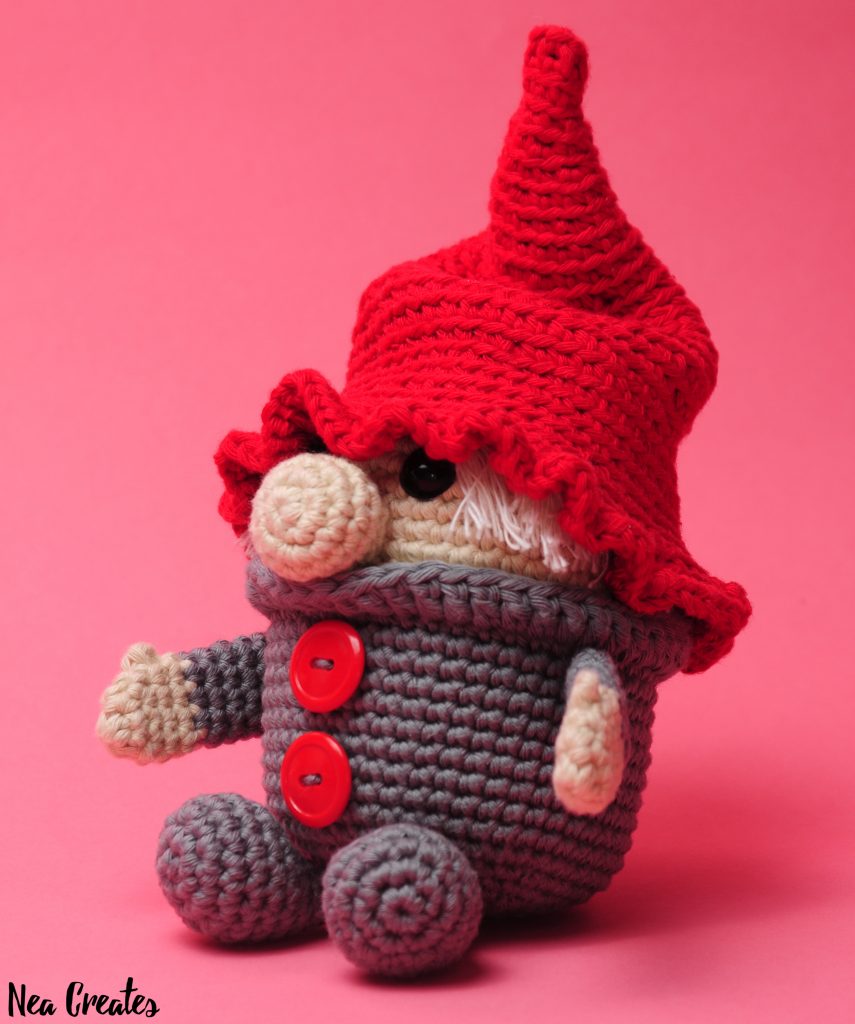
I looove his hair, but I mean, it’s totally optional. The buttons are also optional (I can’t tell you what to do), but I think they add a nice bit of detail.
About the pattern
You can buy a bundle of two beautifully formatted PDF versions of this pattern on Etsy. One version uses color, while the other is made in black and white to be more printer friendly.
Add this pattern to your Ravelry queue on the Gustav the Gnome Ravelry page.
Disclaimer: This pattern is an original pattern by Nea Creates, it may not be redistributed in any way, shape or form. If you want to share the pattern you may link to the pattern post, you may not repost the pattern on your site. Items completed from this pattern may be sold, provided that you give Nea Creates credit for the pattern and provide a link to the pattern post or the Nea Creates home page.
Size: 11cm tall & 8cm wide without hair. Hat measures 14cm tall & 12cm wide.
Difficulty: Easy/Intermediate
Notes: This pattern is written in English, US crochet terminology and SI units are used throughout. I use a smaller hook size than the yarn calls for to get tighter stitches. Gustav is crocheted in continuous rounds. All measurements are approximate & will vary with your yarn & tension.
Materials & Tools
- – Yarn calling for a 4.5mm crochet hook in 4 colors, e.g. Adlibris Cotton 8/9 / Adlibris Cotton Aran
- – Skin color: 21g/32m
- – Shirt color: 35g/53m
- – Hair color: 2g/3m
- – Hat color: 32g/48m
- – A pair of 12mm safety eyes
- – A pair of buttons (optional)
- – A 3.5mm crochet hook
- – Stuffing
- – Stitch markers
- – Scissors
- – Yarn needle
- – Measuring tape
Abbreviations & Stitches used
- R# – Row/round number #
- P# – Picture number #
- N – Note/instruction
- yo – Yarn over
- pt – Pull through
- st(s) – Stitch(es)
- ch(s) – Chain(s)
- lp(s) – Loop(s)
- mr – Magic ring/circle/loop
- ss – Slip stitch
- sc(s) – Single crochet(s)
- dc(s) – Double crochet(s)
- tc(s) – Triple/treble crochet(s)
- inc – Increase: 2 scs in same st
- idec – Invisible sc decrease (normal decrease works too)
- ccsc – Color change sc: insert hook in next st, yo, pt, yo in new color & pt both lps on hook
- fl(s) – Front loop(s)
- flo – Front loops only
- blo – Back loops only
- A – Skin color
- B – Shirt color
- C – Hair color
- D – Hat color
The Pattern – Gustav the Gnome
Nose
N Nose is crocheted in A.
R1 6 sc in a mr (6)
R2 6 inc (12)
R3 [inc, 3 sc]×3 (15)
R4-5 15 sc (15)
R6 [idec, 3 sc]×3 (12)
N Ss in next st. Leaving a long yarn tail, cut yarn, yo & pt lp on hook completely, pull to create a knot. Stuff nose to your liking.
Arms (2)
N Arms are crocheted starting in A & ending in B.
R1 6 sc in a mr (6)
R2 [inc, sc]×3 (9)
R3 9 sc (9)
R4 4 sc, tc, 4 sc (9)
R5 8 sc, ccsc (to B) (9)
N Pull tc out of arm to form thumb.
R6 ss, 8 sc (9)
N Cut A yarn & carefully knot it with B yarn tail inside arm.
R7-11 9 sc (9)
N Ss in next st. Leaving a long yarn tail, cut yarn, yo & pt lp on hook completely, pull to create a knot.
Feet (2)
N Feet are crocheted in B.
R1 6 sc in a mr (6)
R2 6 inc (12)
R3 [inc, sc]×6 (18)
R4-6 18 sc (18)
R7 5 sc, 4 idec, 5 sc (14)
R8 3 sc, 4 idec, 3 sc (10)
R9 3 sc, 2 idec, 3 sc (8)
R10 8 sc (8)
N Ss in next st. Leaving a long yarn tail, cut yarn, yo & pt lp on hook completely, pull to create a knot. Stuff foot to your liking & leave leg unstuffed.
Body
N Body is crocheted starting in A & ending in B.
R1 6 sc in a mr (6)
R2 6 inc (12)
R3 [inc, sc]×6 (18)
R4 [sc, inc, sc]×6 (24)
R5 [inc, 3 sc]×6 (30)
R6 [2 sc, inc, 2 sc]×6 (36)
R7 [inc, 11 sc]×3 (39)
R8 [6 sc, inc, 6 sc]×3 (42)
R9 [10 sc, inc, 10 sc]×2 (44)
R10 [inc, 21 sc]×2 (46)
R11 46 sc (46)
R12 [11 sc, inc, 11 sc]×2 (48)
R13-14 48 sc (48)
R15 47 sc, ccsc (to B) (48)
R16 ss, 47 sc (48)
N Cut A yarn & carefully knot it with B yarn tail inside body.
R17 in blo, 48 sc (48)
R18-27 48 sc (48)
R28 [3 sc, idec, 3 sc]×6 (42)
N Insert eyes between R10 & R11 with 5 sts between on opposite side of ccsc P1. Stuff & shape continuously from here.
R29 [idec, 5 sc]×6 (36)
R30 [2 sc, idec, 2 sc]×6 (30)
R31 [idec, 3 sc]×6 (24)
R32 [sc, idec, sc]×6 (18)
R33 [idec, sc]×6 (12)
R34 6 idec (6)
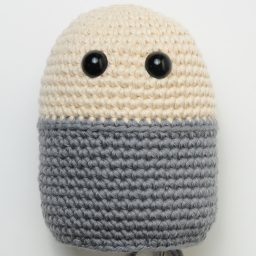
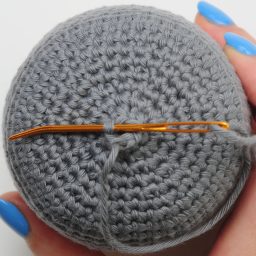
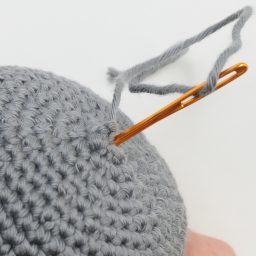
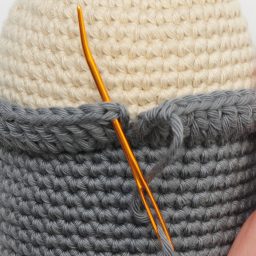
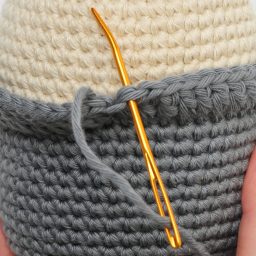
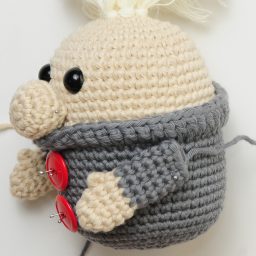
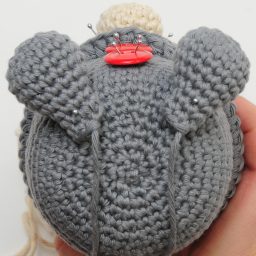
N Make sure body is stuffed & shaped to your liking. Ss in next st. Leaving a yarn tail for closing, cut yarn & pull out of last st. Weave yarn tail around flo of remaining sts (6) P2, pull to close, then bury it inside the body P3.
Collar
N Collar is crocheted in B.
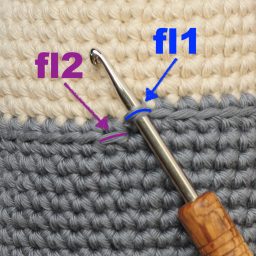
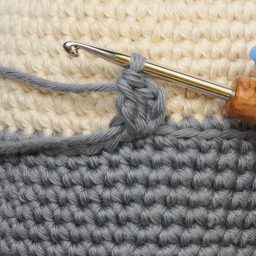
N In the following instructions right & left fls of ccsc from R17 are called fl1 & fl2 respectively P4.
N Insert hook from below in fl1 P4, yo & pt. Crochet around yarn tail in R1.
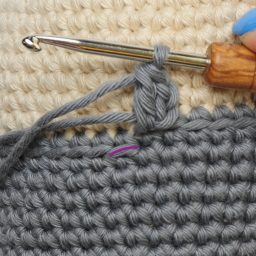
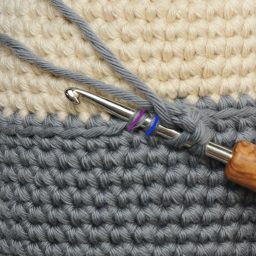
R1 ch 2, dc in fl1 P5, yo & insert hook from below in fl1 & then fl2 (a bit tricky), yo & pt both fl1 & fl2 (a bit tricky), finish dc P6-7, dc in fl2, dc in each of the remaining 46 fls (49)
N Cut yarn & pull out of last dc, pull under both lps of first dc then back down through last dc P8-9, knot, weave in & bury yarn tail inside the body.
Hair (optional)
N Cut 18 15cm long pieces of C yarn, separate into groups of 3.
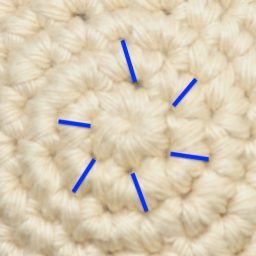
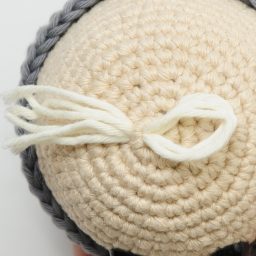
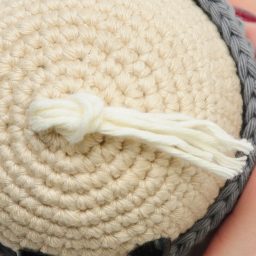
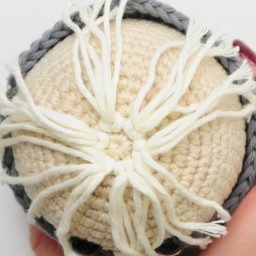
R1 insert hook in first row of body, yo with a group & pt, yo with all 6 yarn tails & pt, repeat 5 times around same row of body P10-13
N Separate each yarn tail into strands (optional). Cut a piece of yarn & tie around hair (optional). Trim hair if necessary.
Assembly
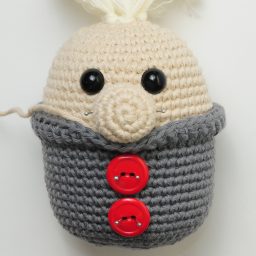
N Sew nose onto face just above collar, sew buttons onto front of body below collar (optional). P14
N Flatten arms with thumb to 1 side, sew arms onto body below collar with thumb facing up P15.
N Flatten leg & sew feet onto bottom of body P16.
Hat
N The hat is crocheted in D & in blo.
R1 6 sc in a mr (6)
R2-3 6 sc (6)
R4 [sc, inc, sc]×2 (8)
R5 [inc, 3 sc]×2 (10)
R6 [2 sc, inc, 2 sc]×2 (12)
R7 [inc, 5 sc]×2 (14)
R8 [3 sc, inc, 3 sc]×2 (16)
R9 [inc, 7 sc]×2 (18)
R10 [inc, 5 sc]×3 (21)
R11 [3 sc, inc, 3 sc]×3 (24)
R12 [inc, 7 sc]×3 (27)
R13 [4 sc, inc, 4 sc]×3 (30)
R14 [inc, 9 sc]×3 (33)
R15 [5 sc, inc, 5 sc]×3 (36)
R16 [inc, 11 sc]×3 (39)
R17 [6 sc, inc, 6 sc]×3 (42)
R18 [10 sc, inc, 10 sc]×2 (44)
R19 [inc, 21 sc]×2 (46)
R20 46 sc (46)
R21 [11 sc, inc, 11 sc]×2 (48)
R22-24 48 sc (48)
R25 [inc, 7 sc]×6 (54)
R26 [4 sc, inc, 4 sc]×6 (60)
R27 [inc, 9 sc]×6 (66)
R28 66 inc (132)
N Cut yarn & pull out of last sc, pull under bl of next st then back down through last sc, knot & weave in.
All done!
If you made your own Gustav the Gnome, please share it with me on social media! @NeaCreates


Your gnome is very cute!
I loved your blog!
Congratulations!
That’s so nice of you to say, thank you!
This little guy is the cutest thing. However, the instructions for his hat is very confusing. For example, row 12 says to Inc, 5 sc x3, for 27 stitches. Well, if you do the x3, you end up needing to do 6sc to get the total of 27. I am now on row 14, and it looks like I’ll have to do 11sc to get the 33 row count. I guess my question is, is his hat not round, but flat in the back? Thanks.
I’m so glad you like Gustav! Thank you so much for pointing this error out to me, I must have been sleepy when I wrote down the pattern for the hat… It is supposed to increase by 3 sts each row. I’ve revised it and the stitch count should be correct now! 🙂
I didn’t know if I was reading it wrong or what. Just finished the hat and it is just precious. I’m going to see if I can figure out how to make a female version. Then again, I may be a bit over my head. LOL. Thanks for your help.
Great! That sounds awesome, I’m sure you’re more than capable! Please share with me if you figure something out! 😉
Hi Nea. Thank you so much for generously sharing your Gustav pattern!!! I love him!! Making one for a Christmas gift. However..after just finishing Row 18 I am beginning to think I am in trouble. You are talking about adding on the eyes! Was I suppose to begin the body at the TOP? Because I assumed I was to begin at the bottom…so, after Row 18 I would not be adding the eyes, for sure. Could you send a word to help me out, please. I just signed up to follow you on FB and to follow your blog. Thanks again for sharing!
Hi! I’m so glad you like Gustav! Yes, the body is indeed worked from the top down, I agree that this wasn’t clear so I’ve added a line to the pattern pointing this out. Thank you for your support! 😊
Well, I’ve finished, and Gustav came out great. Trying to figure out how to send a pic to you so you can see. (((Feeling not too bright.)))
That’s awesome, I got your pictures and your Gustav looks great, good job! 😊
I just finished Gustav. Great pattern. I added troll feet. /Users/lois/Pictures/Photos Library.photoslibrary/resources/proxies/derivatives/21/00/21a6/UNADJUSTEDNONRAW_thumb_21a6.jpg. I hope you are able to see him with this link. Thank you.
Hi! Thank you! 😊 Unfortunately I can’t use the link, I think it’s a link to a local file on your computer. Maybe you can join the Nea Creates Facebook group and post the image there? Or you could email me the image at patterns@neacreates.com? I would love to see the picture! 😊
He is sooo cute. I will try him! Thank you!!!
Thank you! I’m so glad you like him. 😊
tout mignon ce gustav ! facile à réaliser et en peu de temps… pouvons choisir d’autres couleurs.
Merci beaucoup! 😊❤️🙏